• Green Days Lawn Service

    Green Days Lawn Service

    Green Days has a team of professionally trained experts and specialists to ensure every service is performed the right way with the right product and equipment at the right time to maximize effectiveness
  • Guaranteed Results

    Guaranteed Results

    Our Green Days Guarantee assures we will gladly visit your property as needed between scheduled visits to ensure your satisfaction
  • Tailored Solutions

    Tailored Solutions

    Green Days offers tailored solutions to meet the needs of your unique outdoor living space, every season of the year, no matter where you live
  • 1
  • 2
  • 3
Ask a question

Installation Instructions

The following is a guide that covers how to set up your new Ionosphere template on your Joomla! site. Here you can find an overview of the files included in the Ionosphere release and instructions on installing and activating the template in your Joomla! install.

Note: The Bundle Template is only necessary if the Gantry Library is not installed at /components/com_gantry (J1.5) or /libraries/gantry (J2.5).


Step 1 - Installation

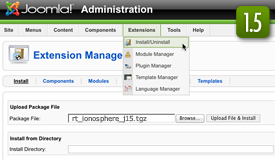
  • (J1.5) Install from Admin → Extensions → Install/Uninstall → Choose File → Select file → Upload File & Install
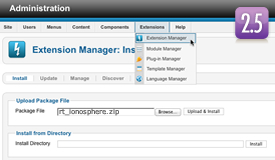
  • (J2.5) Install from Admin → Extensions → Extensions Manager → Choose File → Select file → Upload File & Install

Image Image

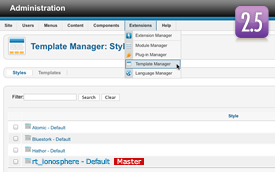
Step 1 - Template Default

  • (J1.5) Make the template default at Admin → Extensions → Template Manager → rt_ionosphere_j15 → Default
  • (J2.5) Make the template default at Admin → Extensions → Template Manager → rt_ionosphere → Make Default

Image Image

RocketLauncher Instructions

We always recommend installing a RocketLauncher first to trial and understand the template more efficiently. It must be installed as new, and not over an existing Joomla install.

Step 1 - Upload

  • Download the RocketLauncher
  • Unzip
  • Upload the created folder to your server

Note: You can upload all the files via FTP, or use cPanel or SSH to upload the zip and unzip directly onto the server. Enquire with your hosting provider.

Step 2 - Installation

  • Go to www.yoursite.com/*folder name*
  • Follow the Installation instructions
  • Ensure you click Install Sample Data during installation
  • (J1.5) Delete the /installation directory on your server
  • (J2.5) Remove the installation folder in the Installation interface
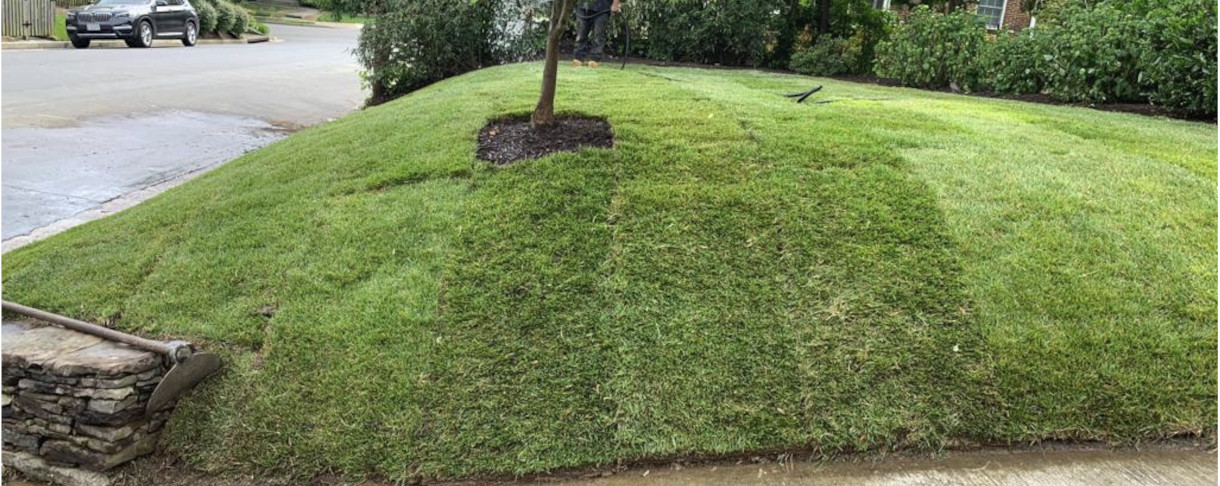
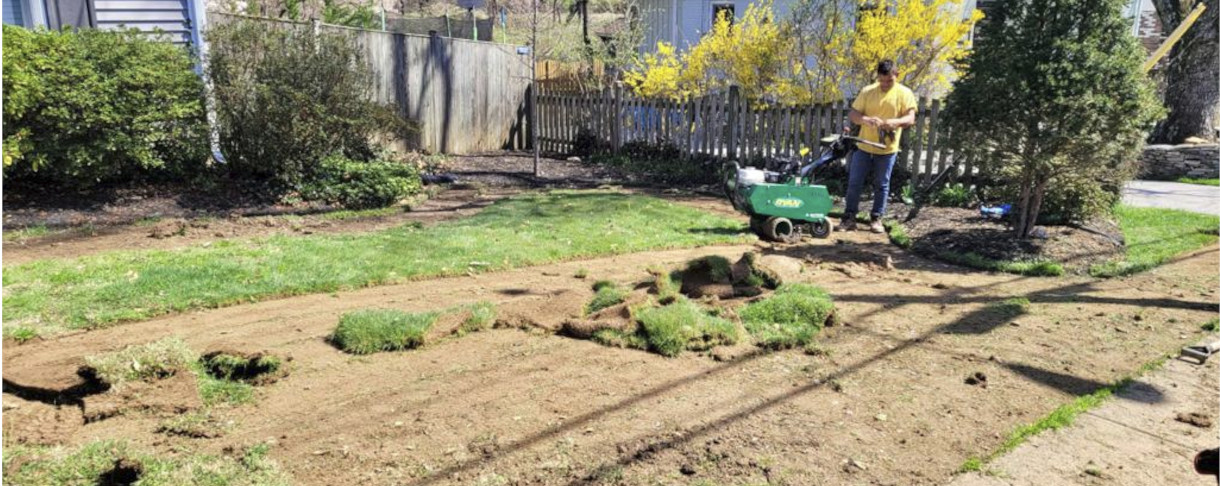
Logo Editing

The following is a step by step guide to customising your Ionosphere logo image by replacing the logo text with your own organization or company's name and logo.

Gantry sets the dimensions of the logo, so CSS modification is unnecessary.


Step 1 - Open the File

Logo
  • Open the logo-source.png file in Adobe® Fireworks.
  • In the right column, find Layers. Select the Web layers directory and click the eye icon to the left of the logo slice (the green object). This will make the slice invisible so you can edit the file.

Step 2 - Text/Slogan/Icon Editing

  • Double click on the logo text. Now you can edit the text of logo to your choosing. Edit the icon as desired.

Logo Logo

Logo Logo

Logo

Step 3 - Slice Modification

  • Reactivate the Slice in the Web Layers column, this will place a green rectangle over the logo image. Change the size of the slice (or move it) to match the new size if applicable.

Logo

Step 4 - Export

  • Now you will want to export the logo. Right click on the image slice and select Exported Selected Slices... from the contextual menu. Export it to your computer.

Preset Styles

Integrated Extensions

Access the Style Control settings from: Admin → Extensions → Template Manager → (J1.5) rt_ionosphere_j15 or (J2.5) rt_ionosphere → Settings

Simple configure the options, then save and Gantry will automatically load the modified preset to your site.

Style Setting

  • Accent Colors: Set the Accent Colors with Color Chooser and the Overlay : Light - Dark to determine the body shade/style
  • Body Style: Set the Accent Colors with Color Chooser and the Overlay : Light - Dark to determine the body shade/style
  • BackGround Style: carbon, noise, paper, plaid, squares, textile, triangles, elegant, grunge, dustnscratches, fibers; Set which background pattern set you wish to load
  • Style Panel: Set the position of Style Panel; Default and recommended position is panel
  • Load Transition: On - Off; Enable or disable the page loading transition animation effects
  • Web Fonts: On - Off, Google Font Directory; WebFonts allow you to use 3rd party WebFonts from providers such as Google. You must SAVE then APPLY before the new fonts will show up in the Font Family dropdown.
  • Font Settings: Select a font family from the available options and also choose a default font size
    • Font Family: Ionosphere, Geneva, Optima, Helvetica, Trebuchet, Lucida, Georgia, Palatino, or Various Google Fonts (dropdown)
    • Font Size: Default, Extra Large, Large, Small, Extra Small (dropdown)

Assigning a Style to a Specific Page

With Gantry, the ability to assign a certain style to an individual page has never been easier and/or more efficient. Just follow these simple steps:

  • (J1.5) Go to Extensions → Template Manager → rt_ionosphere_j15 → Menu Items → *Menu Item*
  • (J2.5) Go to Extensions → Template Manager → rt_ionosphere → Assignments → *Menu Item*

  • (J1.5) Select your preset from Presets → Style Presets, configure and save.
  • (J2.5) Select your preset from Show Presets, configure and save.
Gantry Framework: Per Menu Item Controls

About Joomla!

What is Joomla?

Joomla is an award-winning content management system (CMS), which enables you to build Web sites and powerful online applications. Many aspects, including its ease-of-use and extensibility, have made Joomla the most popular Web site software available. Best of all, Joomla is an open source solution that is freely available to everyone.

What Joomla! can do?

Joomla is used all over the world to power Web sites of all shapes and sizes. For example:

  • Corporate Web sites or portals
  • Corporate intranets and extranets
  • Online magazines, newspapers, and publications
  • E-commerce and online reservations
  • Government applications
  • Small business Web sites
  • Non-profit and organizational Web sites
  • Community-based portals
  • School and church Web sites
  • Personal or family homepages

Site and Administrator

Your site actually has two separate sites. The site (also called the front end) is what visitors to your site will see. The administrator (also called the back end) is only used by people managing your site. You can access the administrator by clicking the "Site Administrator" link on the "This Site" menu or by adding /administrator to the end of you domain name.

Log in to the administrator using the username and password created during the installation of Joomla.

Learn More

There is much more to learn about how to use Joomla! to create the web site you envision. You can learn much more at the Joomla! documentation site and on the Joomla! forums.

Visit Joomla!

Great Service

 
image

Professional Lawn Service

We are a team of professionals offering services that range from lawn mowing to Spring & Fall clean-up, gutter clean-up and other services upon request. If your shrubs are overgrown or your flowerbeds are full of weeds, we can transform your landscape with a property seasonal clean-up.

Our Team

Our Results

Customer Reviews

  • Review 1 +

    1
  • Review 2 +

    2
  • 1
  • 2
  • 3